Tuesday, May 31, 2011

Two gets a Headlight Relay Harness

Say what? Why?

A headlight relay harness. Even current vehicles come from the factory with poorly designed headlight wiring. The power is routed from the alternator/battery up behind the dash, through fuses and switches and THEN back up front to the headlights.

What is wrong with that?

Low voltage DC electricity (ie: 12volts) is very susceptible to voltage loss. Each connector, switch and foot of wire reduces the voltage at the end. (Remember the manufacturers accountants have their shot at the designs before the car was built. Do you think they put in BETTER switches and other parts than they had to?) We are also talking about a 33 year old motorhome... how good do you think those 70's connectors are today?

The voltage at the sealed beam headlights (also being replaced... the next project I will post) is only about 10.5 to 11.5 volts. (The charging system should be running over 13 volt to charge the battery(s).) This doesn't even let the sealed beams put out what little light they are capable of. While the best harness would be custom built for the exact application, from quality parts, I bought a pre-made harness. It was to short for the motorhome so I extended it. I also added a ground return wire (10 gauge) and two other auxiliary wires (fog and city lights).


It is ten feet from the far headlight plug (driver's side) to the ground wire, another 1.5 to the relays and a couple of feet to the passenger side headlight plug and control pick-up.


Relays, control pick-up and passenger side headlight plug.


Driver's side


Installed. Passenger side.


Installed. Power CB and ground points. Power comes from chassis side of the isolator. I could boost the voltage about 1/2 volt if I tapped from the center post of the alternator... but the headlights would go out if the engine stopped.


Installed. I followed the stock wiring harness across the coach.

Installed driver's side. (With the E-Code headlights.) Overall, much brighter. If something happens to the relays, the old harness and plugs are still there... just taped off.

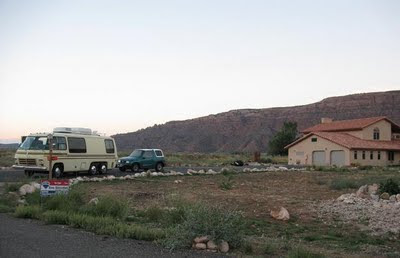
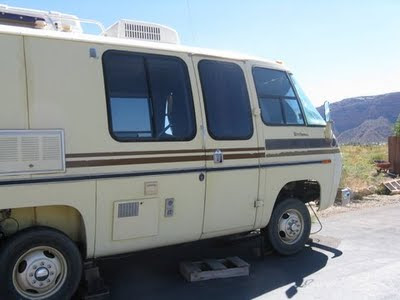
Number 2 coach -- this project was about $100.

Saturday, May 21, 2011

Pick-N-Pull Trip

The local Pick-N-Pull had a half off sale. So I spent a few days picking up parts for future projects. I picked up some of the items for trading stock. I hit the largest yard one day and two of the three other yards the next day.


Steering wheels, cruise control units, old GM wiper motor (for thermasan), Lumina wipers.


Later Chevy/GMC tail lights, height controllers (possible to be modified for EL2 replacements), a seat switch for our Audi.


Spare tire covers

The wheel I used, more Lumina wiper arms, speed sensors for cruise control.


While I like the DESIGN of the four spoke wheel, this single spoke FUNCTION is much better. It doesn't hide the gauges like the OEM. It also has a good place to mount the cruise control remote. (A future project that is on the list along with lowering the wheel.)

Note the Honda seats. I'll be posting pictures of that project soon.

The installed wheel cost about $7.00.

Wednesday, May 18, 2011

Recovery of Number 3 Coach -- part two

It took 3 days, but after reinstalling the instrument cluster, going through the wiring and disconnecting anything that I didn't need to get home. Tying up all the disconnected items, changing the oil (and just adding enough oil to ensure it was "full") Patching together the exhaust, Picked up a travel permit from DMV. Installed the carb from my 1973, charging up the old battery... I tried to start it.

The fuel pump was bad. The parts stores in town couldn't even order one for two days. Installed an electric pump. and by passed the mechanical. Installed the new Eagle wheels I brought from home with rubber bought in Moab.

Got the blinkers working and figured out why the headlights would not work. (The relays the PO added had corroded and needed replacement. Jury rigged the towd wiring and hit the road.

The PO let me stay in his house and even fed me breakfast and dinner each day. Thanks Larry!


Larry's former house.


It took me three days to get home, it ran fairly well for 120 miles then started getting symptoms of vapor lock or a bad ignition module. I also need to find relays for the headlights before dark. So I stopped at quite a few Auto parts stores in the Salt Lake area. I made it into Idaho and stopped a Wal-Mart. In the morning, in a pouring rain, I moved the fuel pump from up front (near the non-functional mechanical one) to next to the tank. I limped the coach... through the rain into Oregon. I pulled the filters and found them full of rust. Figuring the tanks had rusted while sitting for years, I bought a gas tank for and outboard boat motor. I also picked up one more fuel pump. the following pictures show how I drove the last day to get home.

6 gallons at 7 or 8 mpg doesn't give much range.


As I had disconnected all the house wiring, I used the house side of the isolator to power the fuel pump. As a safety feature... If the engine stops, there will be no alternator output... nothing will be applied across the isolator to power the pump. But I needed a way to prime the carb before starting... the boost solenoid was right there... already wired in!

You like my center console? A plastic slim line cooler and two new mufflers in boxes, all strapped to the dash. My netbook with GPS software helped me find gas stations and auto parts stores. The horn is activated by grounding the wire in the center of the wheel.


The air system leaked when I applied pressure. I did not trouble shoot. I just installed tank valves. (I had to use 1/8 inch with 1/4 inch adapters.)

This picture was taken the day after getting home. After I took the Eagle wheels and tires and installed them on my other Birchaven. We then left for the Treasure Island Rally.

Wife has gotten confused when I talk about the '73, the '78 or the '77. So the coaches are now called "one" (the 1973 26 foot exPainted Desert) "two (the 1978 23 foot rear bath Birchaven) and "three" (the 1977 23 foot Birchaven).

So... Three has landed. Now to get the title in my name.

Recovery of Number 3 Coach -- part one

If you have been reading my posts, you already know that I bought a "core" coach for my "2040" project. (I plan on rebuilding it with the idea that I'll still be using it in the year 2040. Do you know what kinds of fuel will be available then?)

I didn't take my own pictures when I got there. I also didn't take pictures during the three days it took to get it running. These are the pictures I was sent by the PO, Larry. (PO = Previous Owner)


The coach had been on blocks for several years. This picture shows two of the four tires bolted to the coach. (One was the spare.) The PO bought the coach in Texas, installed new tires and drove it to Utah. Where he took it apart to customize it. He never drove it again. The tires where so dry rotted, they could not be used.


The picture cuts off the blocks the coach is setting on. The only wheel on the driver's side is the rear most.


It has new waste tanks and a maceator (not connected electrically) that have never been used.


A home-made dinette. Nothing at all like the Coachman units.

PO built dash. I did not see much practicality in the design. No defroster vents. (Just a big hole on top of the dash.) No glovebox... just a hole to access the OEM fuse box. I DO like a flat top on the dash. Nice seats... wish I liked the color!


The steering wheel was only set on the shaft... no nut, no horn "guts." none of the dash instruments or switches were connected. The instrument cluster itself isn't attached to the dash in this picture.


New range and faucet, PO built cabinets. NO storage under the sink. No access to the furnace to service.


Pretty ceiling. Good thing it didn't rain much in Moab Utah... the roof wasn't checked for leaks before insulation and ceiling installation.


These are original miles... odometer has NOT been turned over. I understand this coach has spent a large chunk of it's life on blocks. (Like it currently is next to my house.)

Other issues.

-- The coach hadn't been started in 5 years.
-- While it had new down pipes and mufflers, it did not have a Y pipe connecting them to the tail pipe.
-- The oil dip stick tube is broken off near the block.
-- Many thing had been dissembled. Nothing marked.
-- Many new, never installed parts that may or may not be usable on this coach..

End of part one.

Tuesday, May 17, 2011

Reseal The Curb Side

I was working on the generator of my 26 foot coach, and having problems with the points. When taking a break from cussing at the Onan designers, I noticed a slight gap between the rub rail and the side of my 23 foot Birchaven. Not thinking to clearly, I started poking it with my finger. (I had just got off a 12 hour shift....) Well, the rub rail just fell off!

I forgot to take pictures, but it was UGLY!

When cleaning up under the rub rail, I noticed that a few of the edges of the side panels had come loose from the ribs. Those should be addressed also.


I had cleaned up the PO applied silicone from the gaps and masked the area. (Always mask for ANY sealant.)


I filled the seams at the edge of the panel with a 3m product... "5200" or something. It is an adhesive as well as a sealant. (It is permanent, so be careful with the stuff!) They make it in several colors and they say it'll hold paint if painted. (not the same as "Paintable.") After working the sealant under the panel, I applied pressure to hold the panel against the ribs. The "5200" takes a few days to cure.


I removed the masking and cleaned up any stray sealant.


I primed the rub-rail... we had to make a trip.


While I do want to remove the rub-rails and paint under them body color, I am not ready for the full project. So... I painted a "rub rail" onto the side of the body.

This project was done in July 2010... The last paint was applied in September.

Total cost about $35... with about 3/4 tube of sealant left over. We'll see if the little rubber caps I bought will save the rest of it.

Sunday, May 15, 2011

Clearance Lights -- clean and new lenses

After over 30 years of being in the sun, the clearance lights look pretty sad. AND that isn't the worse part. The problem is they are no longer water tight. Water leaks through the lights (corroding the sockets) and seeping inside the coach. Last summer I did this project.

For the most part, the lights still work. JimK at Applied GMC has the lenses and thicker gaskets for cheap. I got all 10 gaskets and lenses for under $30.

The lights had been sealed by silicone. I wanted to clean it up some.

To reach the outer lights I used a ladder. Note the padding protecting the side of the coach. The middle lights I just laid down on the roof.


Old dry non-sealant. Ugly!


The gasket dried out... no way this sealed.


I used a pick to pull most of the non-sealant. If you do this, do not scrape with the point.


After most of the non-sealant is removed, the goo gone removed most of the residue.


As I did not replace the gasket under the light, the edges will need to be resealed. It doesn't matter what color the sealant is, ALWAYS mask the area. (I installed the old lenses for this step.) I also cleaned up the insides with a Harbor Freight "dremel like" tool. I used rust converter and dielectric grease. I had to glue the socket back to the base on a couple of lights. (I had some old epoxy clay.) I did not take pictures of any of this...


New lenses, stainless steel screws, new sealant around the edges. Lights look good. (I did the rear ones before the fronts.)

I think total cost for this projects was about $40. Done on #02 coach, summer 2010.

Sidekick Towd -- 4 Sale.

While this 1995 Sidekick makes a good towd, (light and can be pulled 4 down) we need something a bit bigger for our other uses. We want a four door version of the same rig. Maybe a "Sport" model... as I like the plastic flares.

I had just washed it in a few of the pictures and it is still wet.


White fiberglass roof. Does make opening the rear door a "puzzle." Needs new gas struts.


Note the wheels: The set on the ground are Sidekick wheels with Studded Mud and Snow tires. The spare is a Tracker wheel. I have 5 of each type wheel. Only one SET of 5 alike wheels will be included in the price. I am installing the summer tires (tracker wheels) today.

The following pictures are before washing with it where it had been parked for a while.


Some towd mileage might not show on Odometer. (Three PO's towd this... )

Notice the cracked windshield. I "paint brushed" a red line on each side of the crack. It does go from the bottom up and across, then back down. It is not in the driver's line of sight.

Some underside shots:


West coast rig... no frame rust. It will need a muffler.

I have the Base-Plate (tow brackets) and Roadmaster "Stowmaster" 5000 tow bar. I removed it when I thought I had it sold to my son. They also are NOT included in the "base" price.